Configure a Persistent Usage Log Server
Learn how to Configure a Persistent Usage Log Server that connects to all instances of Your FaceTec Server.
Persistent Usage Log Server
In this type of setup, the Usage Log Server is hosted on its own Server, and each instance of the FaceTec Server is hosted on its own separate Server. Each of these FaceTec Server Instances send their Usage Logs (via Port 3000) to the Persistent Usage Log Server. The Persistent Usage Log Server than aggregates all of these logs and sends them to FaceTec.
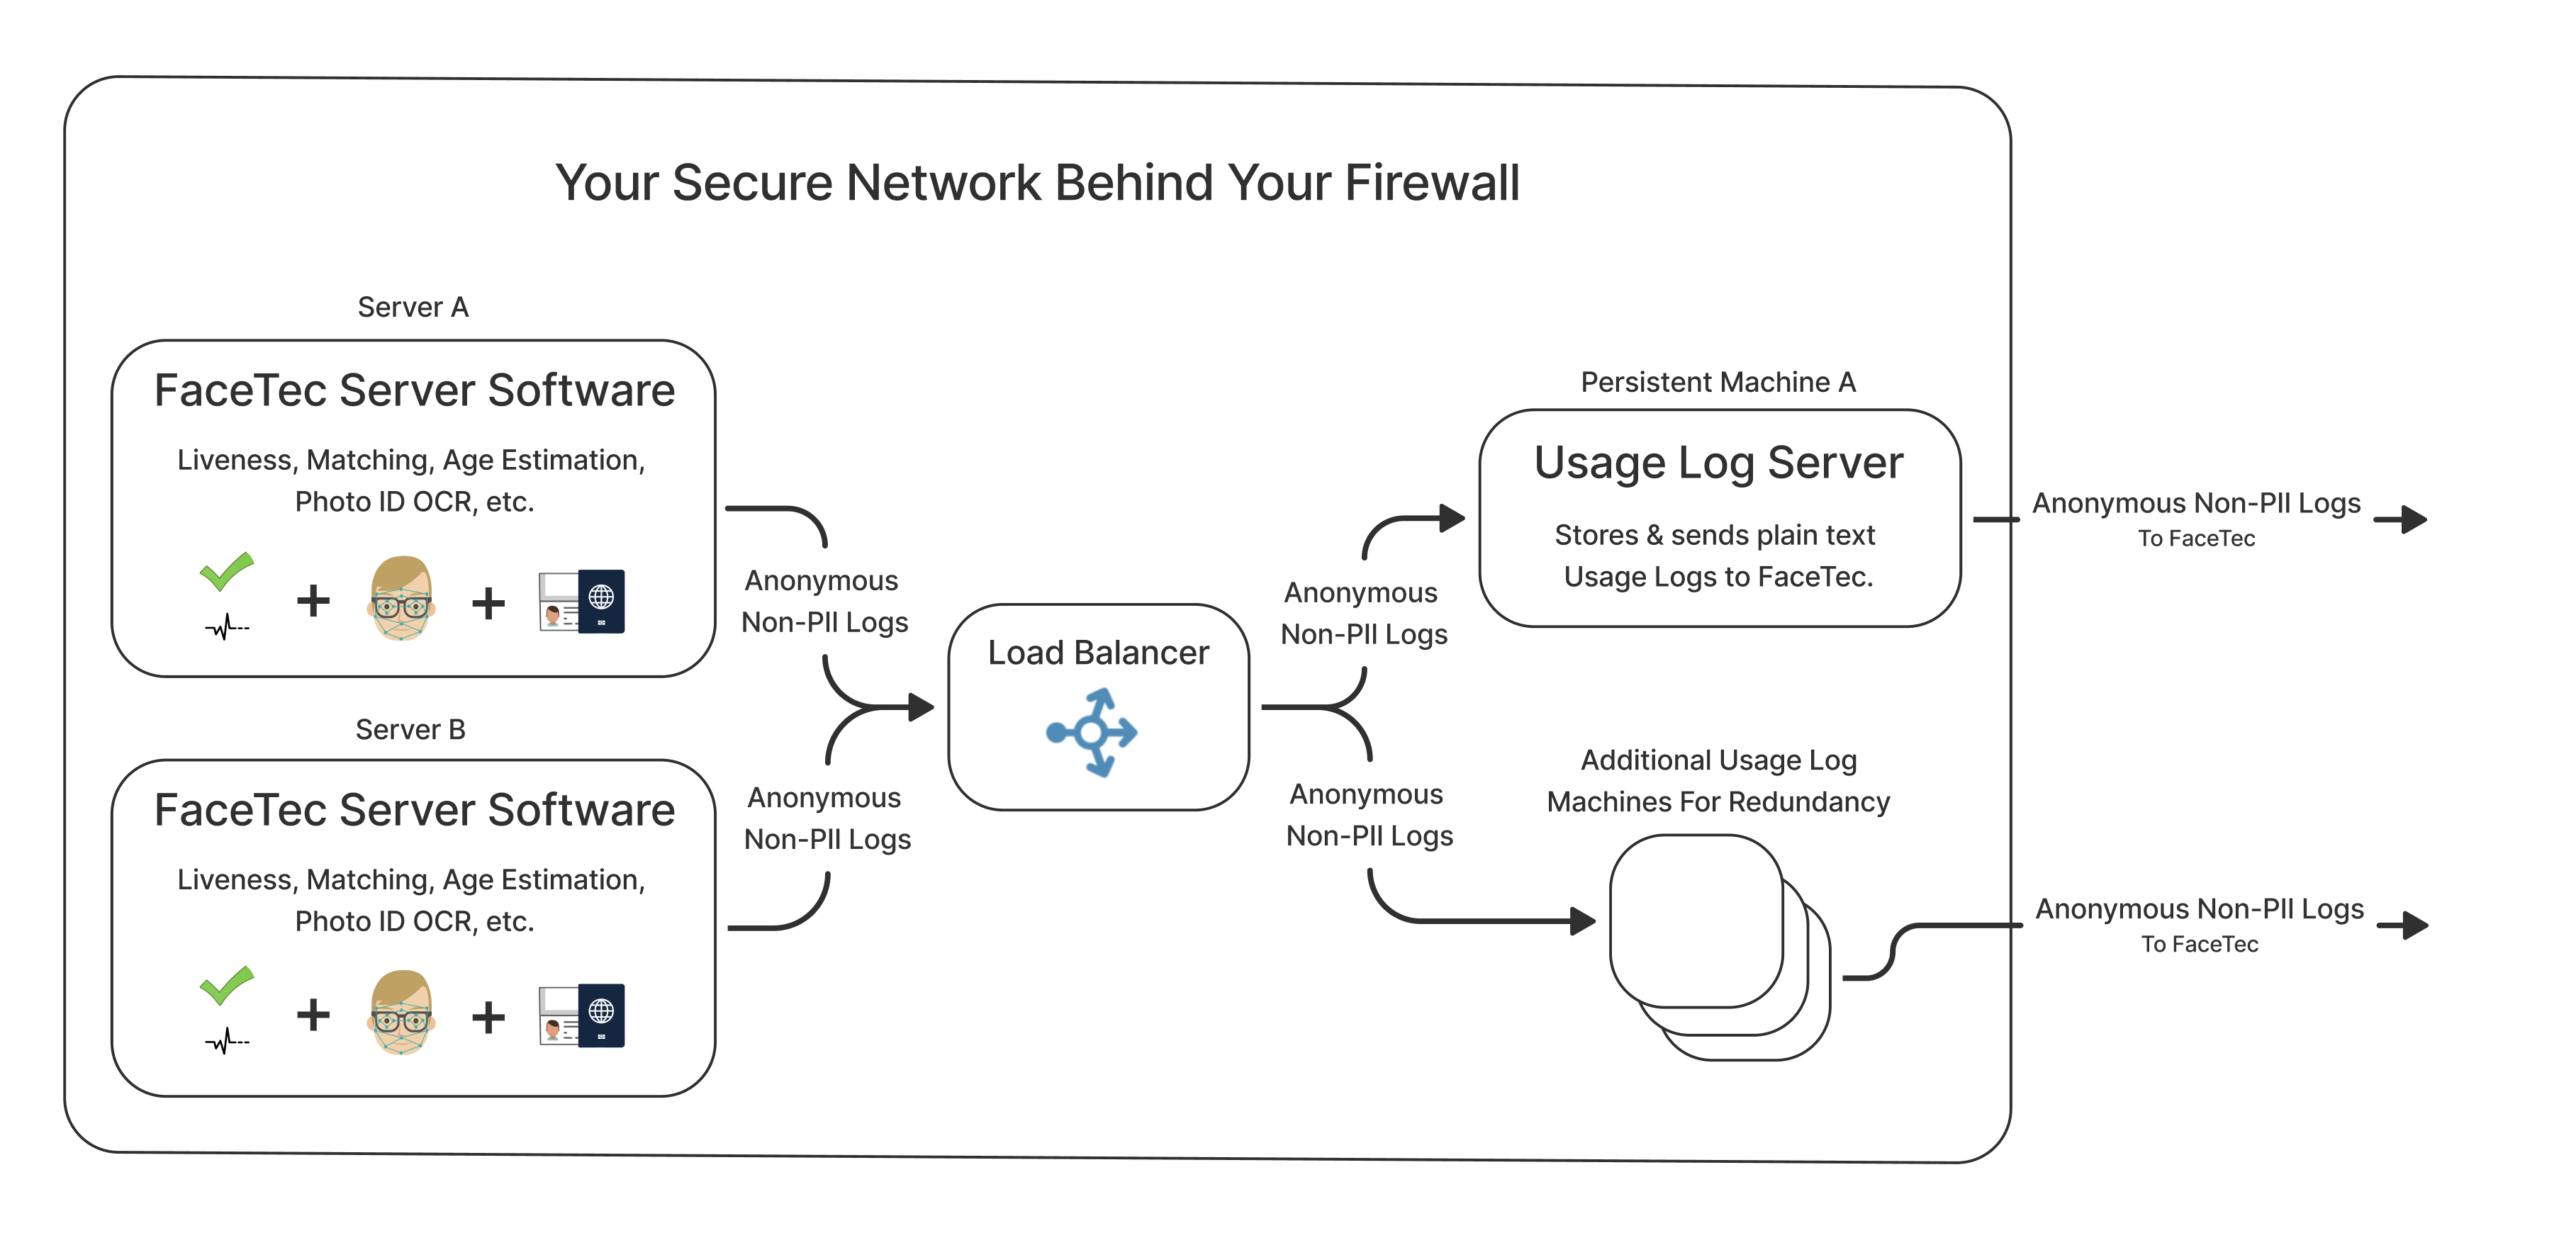
Configuration (Single Persistent Usage Log Server)
Important Note: These steps only apply to the case where there is a Single Persistent Usage Log Server. In a Production Environment, you will likely want to use a Load Balancer to ensure access to multiple Persistent Usage Log Servers.
Prerequisites
- Install Docker (via the Official Docker Website or Command Line) on every Instance of the FaceTe Server, as well as the Persistent Usage Log Server.
- For each Instance of the FaceTec Server, configure Outbound Network Traffic on Port 3000 (to send Usage Logs to the Persistent Usage Log Server).
- For each Instance of the FaceTec Server, configure the default Inbound/Outbound Network Traffic Settings (AWS EC2 Example).
- Configure the Persistent Usage Log Server to receive Inbound Usage Logs (Port 3000).
Step 1: Download the Server Package
- Download and Extract the latest version of the FaceTec Server Package.
- Create a copy of the FaceTec Server Package and rename it to Minified-Server-Package. Afterwards, rename the original FaceTec Server Package to Full-Server-Package.
- Remove the following directories from Minified-Server-Package*:
- Postman-Test-Suite
- FaceTec-Dashboard
- Diagnostic-Scripts
- FaceTec-Server-Webservice/FaceTec-Server-Webservice-10.xx.xx
- FaceTec-Server-Webservice/FaceTecSDK-Server-Core-10.xx.xx.
- Re-zip the Minified FaceTec Server Package:
zip -r Minified-Server-Package.zip Minified-Server-Package.
* Important Note: While this step is not strictly required, it is recommended since it will result in a cleaner workspace for the Usage Log Server.
Step 2: Create the Persistent Usage Log Server
- Transfer the Minified FaceTec Server Package (Minified-Server-Package) to Your Server:
scp /Path/to/Minified-Server-Package.zip <USERNAME>@<SERVER_ADDRESS>:/Path/on/server. - ssh into the Persistent Usage Log Server:
ssh -i <SSH_KEY> <USER>@<REMOTE_IP>. - Unzip the Minified FaceTec Server Package:
unzip Minified-Server-Package.zip. - Go to the FaceTec-Server-Webservice/Docker-Deployment-Scripts Directory.
- Start the Usage Log Server with Docker Compose:
docker compose build facetec_usage_log_server && docker compose up facetec_usage_log_server - On success, the Usage Log Server will run.
Step 3: Run Each Instance of the FaceTec Server
- Open the Original FaceTec Server Package (Full-Server-Package).
- Go to FaceTec-Server-Webservice-10.xx.xx.
- In config.yaml, update
usageLogServeRUrito use the Persistent Usage Log Server's IP Address and port 3000. - Re-zip the Full FaceTec Server Package (Full-Server-Package):
zip -r Full-Server-Package.zip Full-Server-Package. - Transfer the Full FaceTec Server Package to each of Your FaceTec Server Instances:
scp /Path/to/Full-Server-Package.zip <USERNAME>@<SERVER_ADDRESS>:/Path/on/server. - On each of Your FaceTec Server Instances, build and run the FaceTec Server's Docker Image with either the Prebuilt or Recompiled Commands:
- Prebuilt Command:
docker compose build facetec_server_prebuilt && docker compose up facetec_server_prebuilt - Recompiled Command:
docker compose build facetec_server_recompiled && docker compose up facetec_server_recompiled
- Prebuilt Command:
- On success, each of the terminals running the FaceTec Server via Docker will output "FaceTec Server is started and ready to go."